Tips for Photographing Birds - Regardless of Gear
Bird photography is one of those genres where you can’t go 10 minutes without reading about how useful that $10,000 lens is, and how important it is to have a camera that costs as much as a used car. Don’t get me wrong - this is for good reason. Bird photography is very often a challenging genre where you need fast, long lenses, and a great autofocus system. But all that gear discussion can obscure the fact that there are key skills to bird photography that will enhance your images regardless of what equipment you use. This article will focus on those tips and techniques, so that no matter what kind of camera and lens you have you can improve your bird photography.
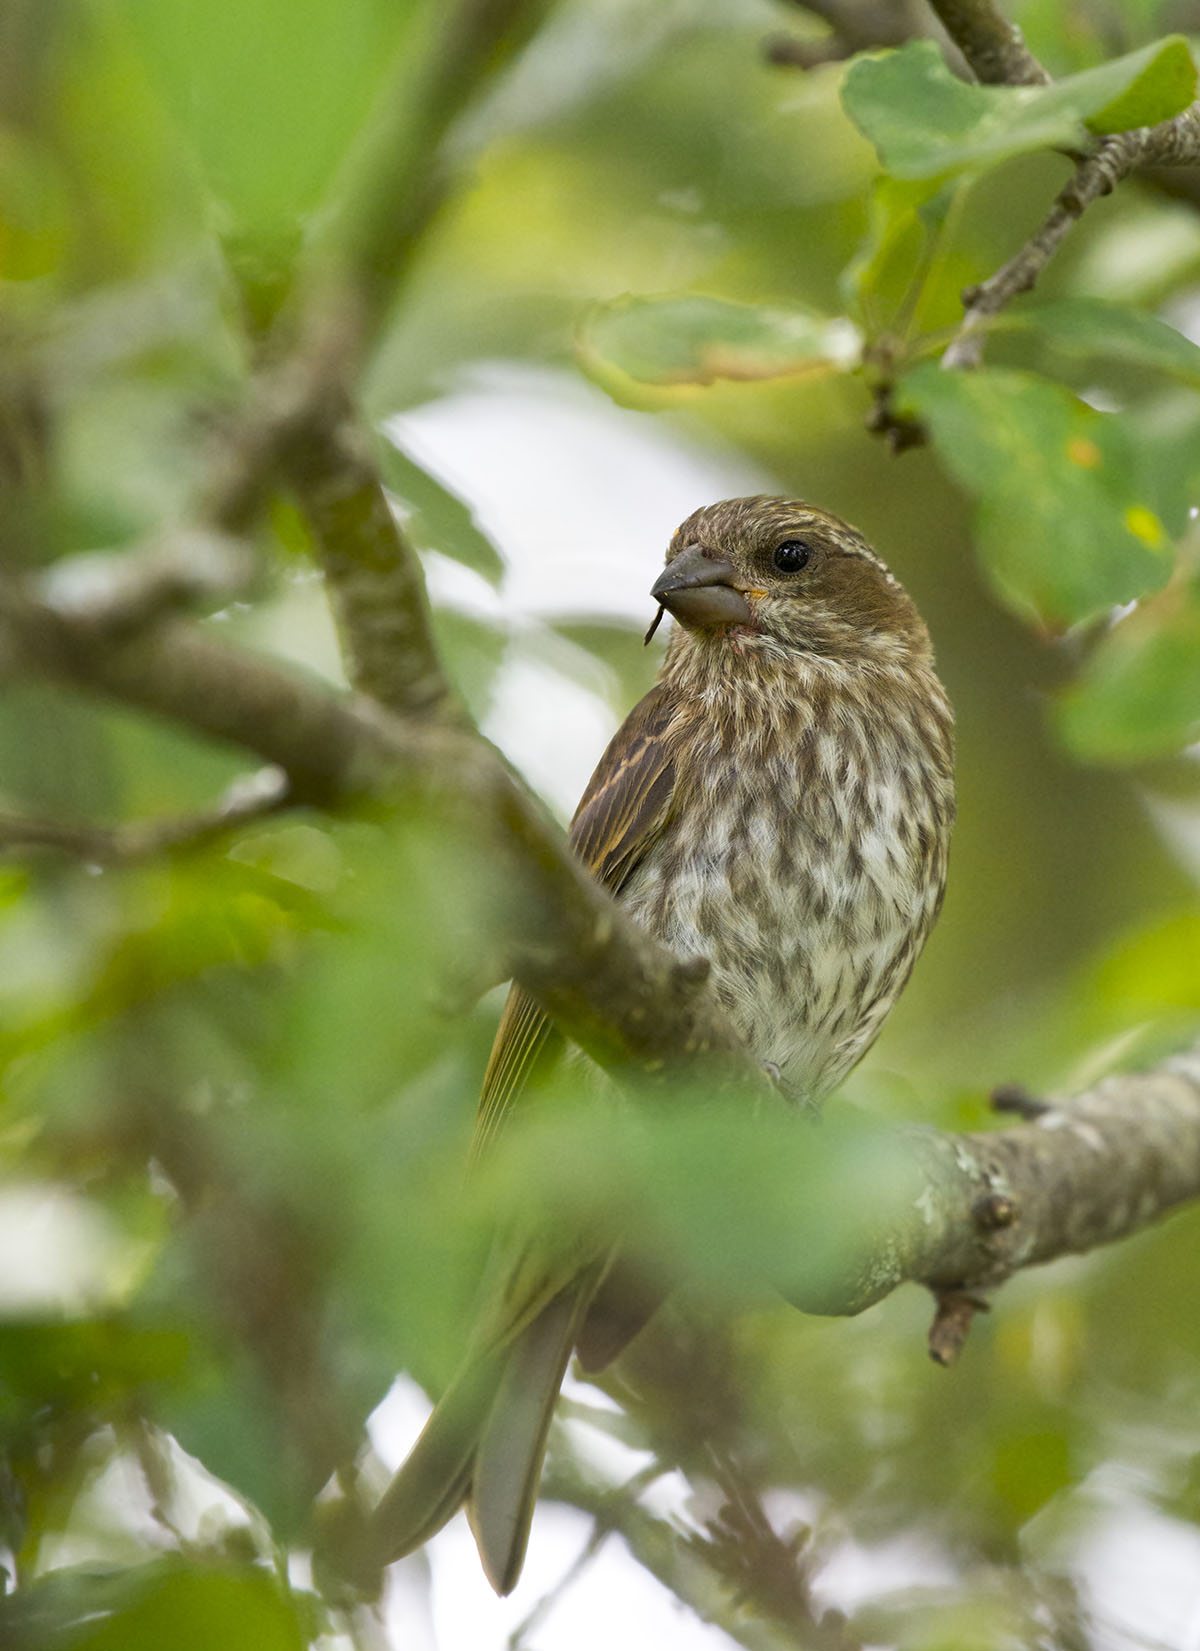
Isolate the subject
Often birds are hidden away in dense foliage, making it difficult to get a good shot. Whether you have a 200mm f5.6 lens or a 400mm f2.8, you can’t get around the fact that foliage in front of the bird is going to be distracting.
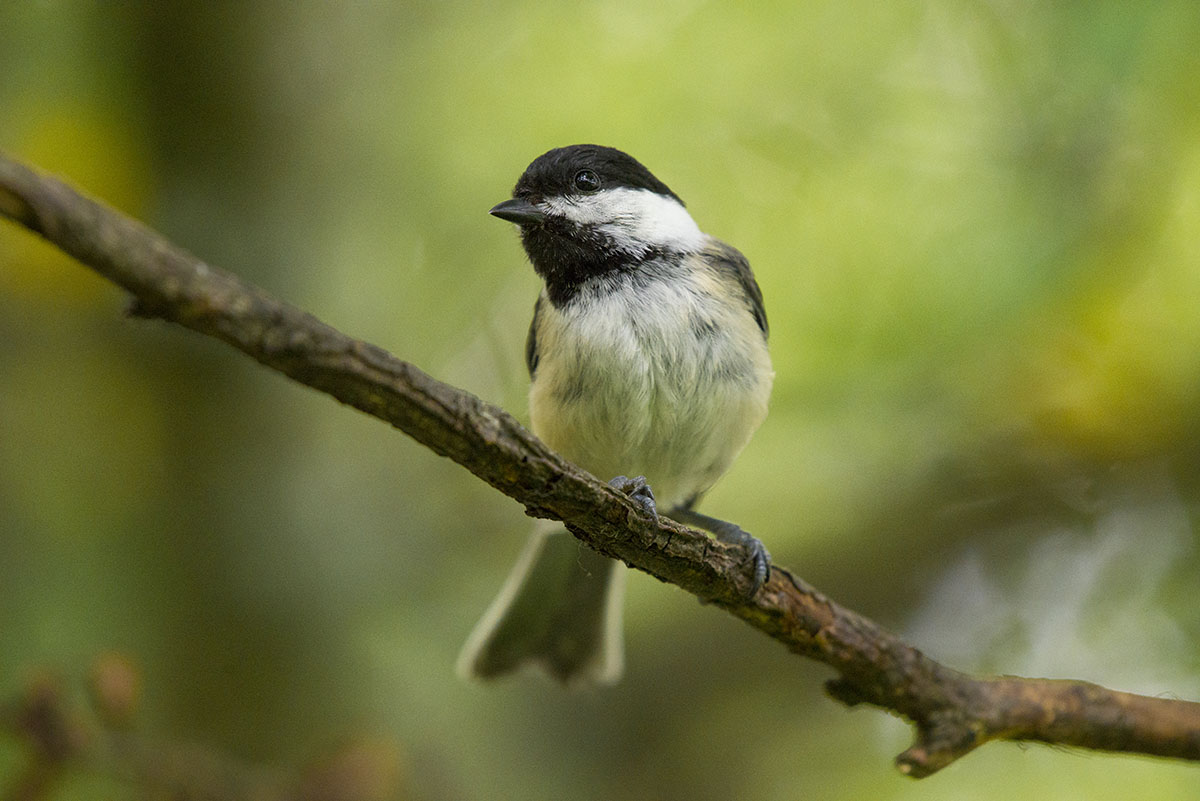
Be mindful of what’s in the viewfinder - it’s easy to look only at wherever your AF point is, but if you want to get the best possible photo you need to look at the whole frame and move into a position where the composition of the whole scene is best. For example, in the photo of the chickadee above there’s no foliage in the foreground, making for a very clean image. But also notice the dark blurs in the background where branches are. Had those been directly behind the chickadee, it would have caused the subject to stand out less. Positioning the dark head of the bird against a bright background was key to completing the subject isolation in this image, so consider both the foreground and the background when shooting.
Deal with whatever nature throws at you
Birds are wildlife, and as with all wildlife you can never quite predict how a photo will turn out. Sometimes you’ll capture a moment that is interesting, but not necessarily attractive. Take the photo of the nuthatch below - there’s a fly on its head, a rather ugly hat.
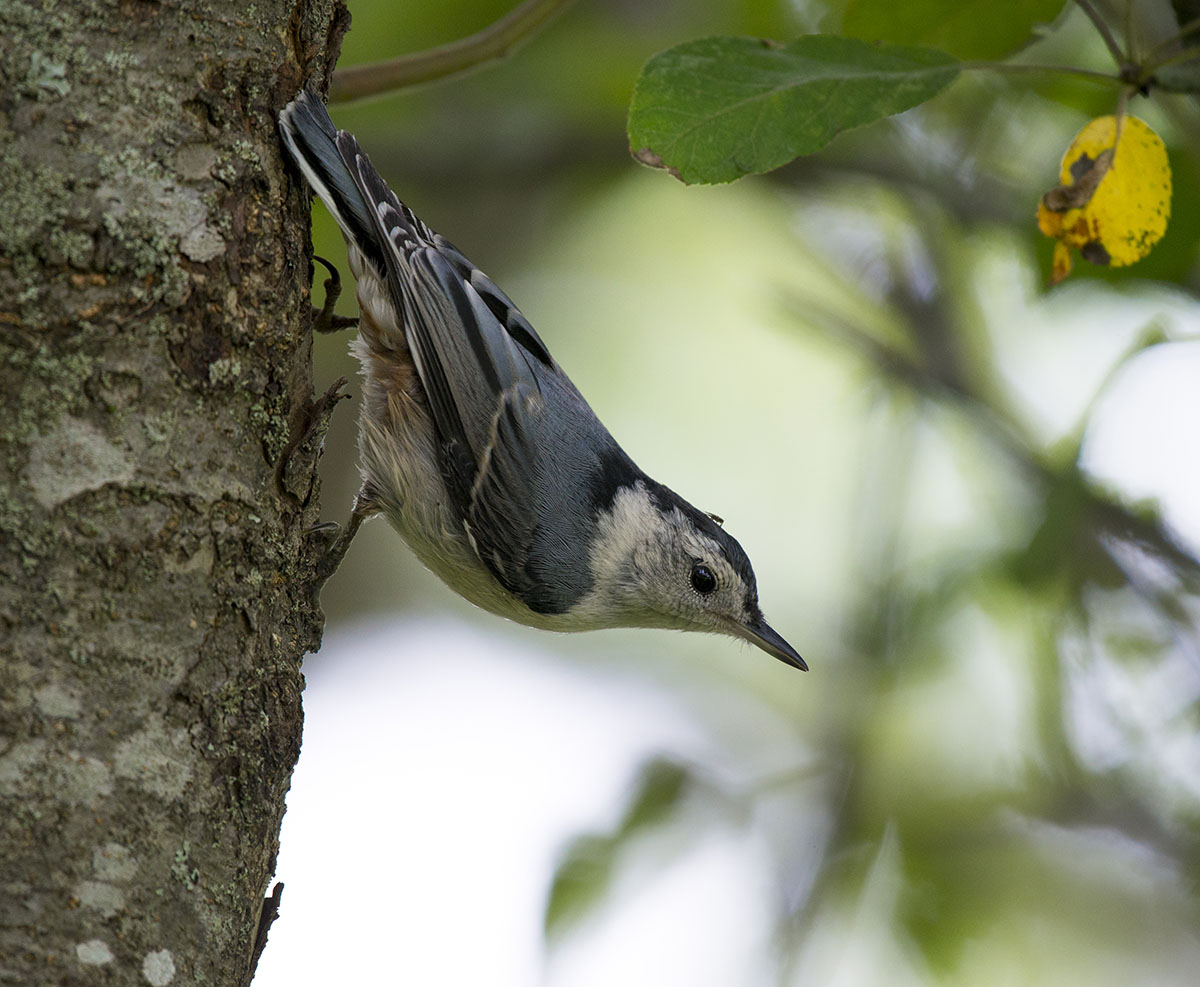
However, it’s true to life, and a somewhat interesting interaction between two animals that you wouldn’t tend to see without the camera. So do you keep the photo as is, or PhotoShop out the fly?
This is purely a personal decision, but it will be influenced by what you want to do with the photo. If you want to print the photo to decorate your home, or sell prints to others, you probably want to edit out everything that detracts from the image. Whereas if you’re selling stock photography to text books, or shooting for a bird watcher magazine, showing that interaction could be valuable. Ultimately, either choice is valid, and it’s something you’ll have to judge on a case by case basis.
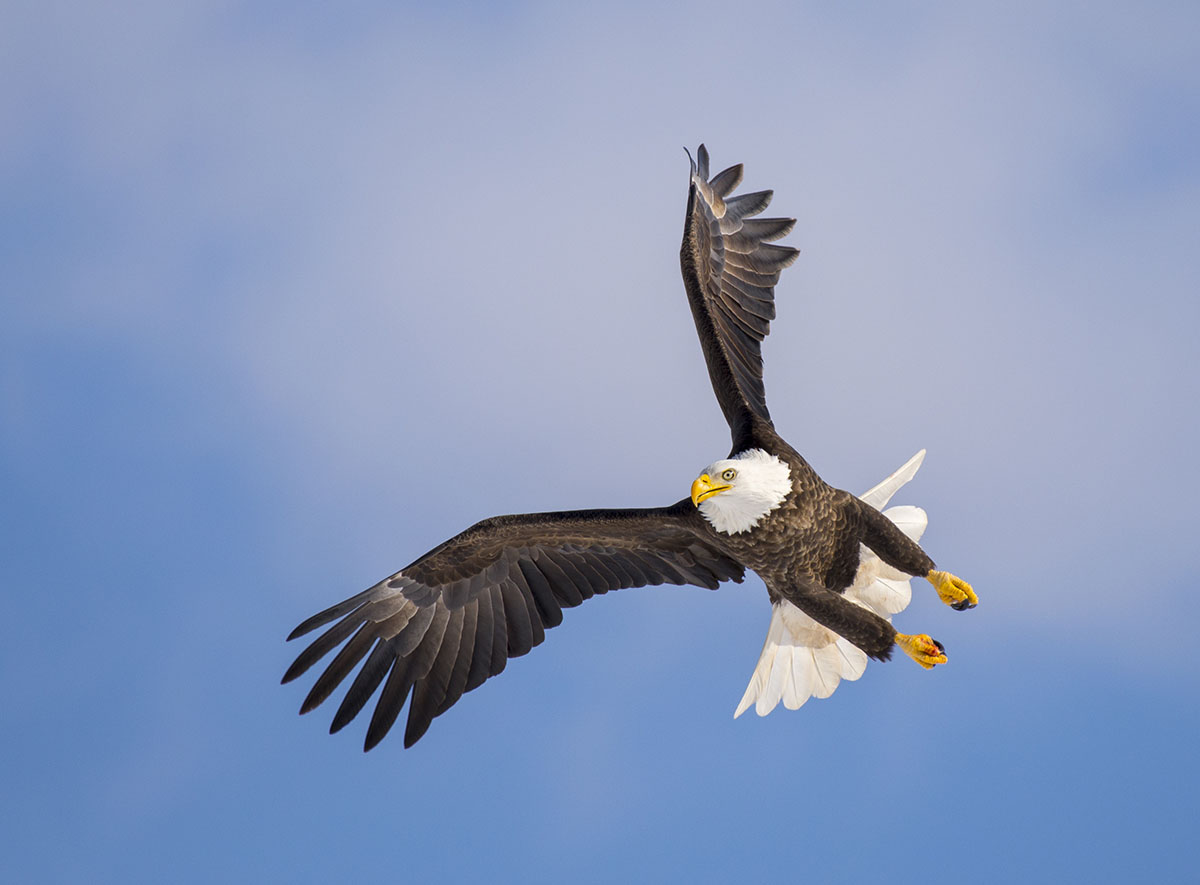
Capture the action
Eventually, it gets boring seeing birds sitting on branches or flying through clear skies. Spice things up a bit and try to catch the moment where a bird is doing something more dramatic.
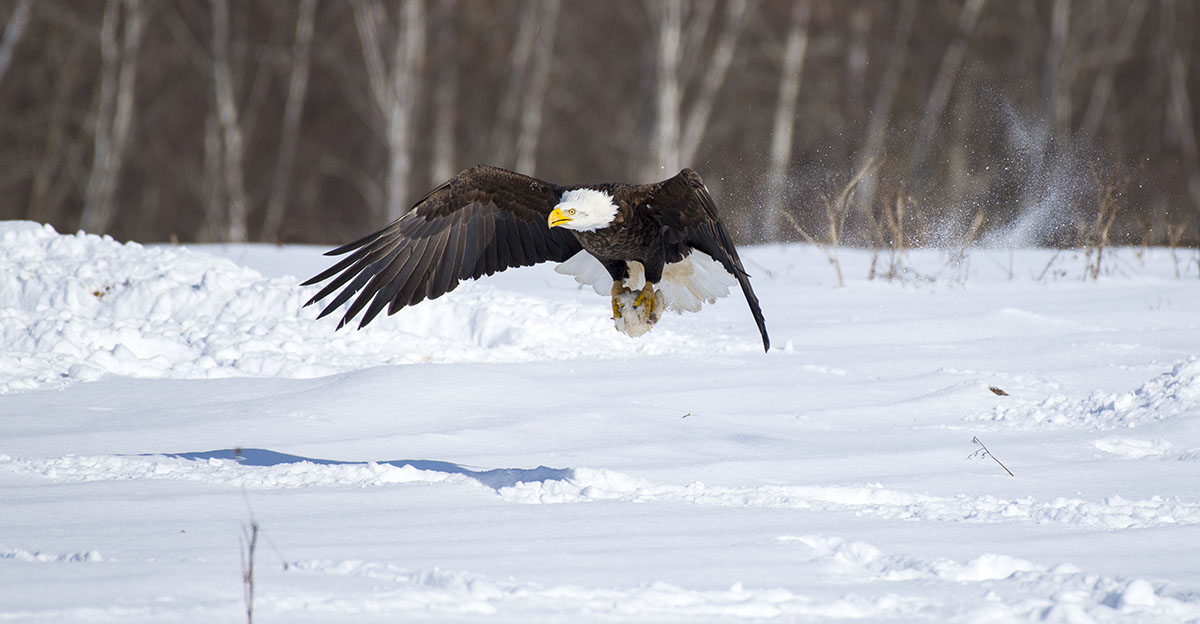
Of course, this kind of shoot is a lot more challenging. Not only do interesting moments happen infrequently, but their speed and unpredictability make trying to get a sharp shot difficult. One of the best ways to increase your odds of success is to spend time observing the bird, or bird species, and pick up on the habits and “tells” for when it’s about to do something. For instance, Bald Eagles tend to hover in place, crane their neck a bit, and pull their feet under themselves right before diving.
If you see that a bird’s about to take off, or you suspect that they’ll dive towards a certain location, consider locking your focus on that point with back button AF. That way you can shoot without worrying about the focus getting confused by the moving subject and tracking the wrong thing, and you’ll also be able to shoot at your maximum fps. If you have a very high end camera and lens this might not be necessary though - for instance a 300mm f2.8 will usually track fast enough that it can follow challenging subjects. But with my D610 and 200-500 I find that locking focus can minimize the risk of the AF switching to the wrong subject.
Get on eye level
Just like with photos of kids, we love the connection that an eye level image creates between the viewer and the subject. Even birds can be cute and anthropomorphized in our photography, making for more engaging images.
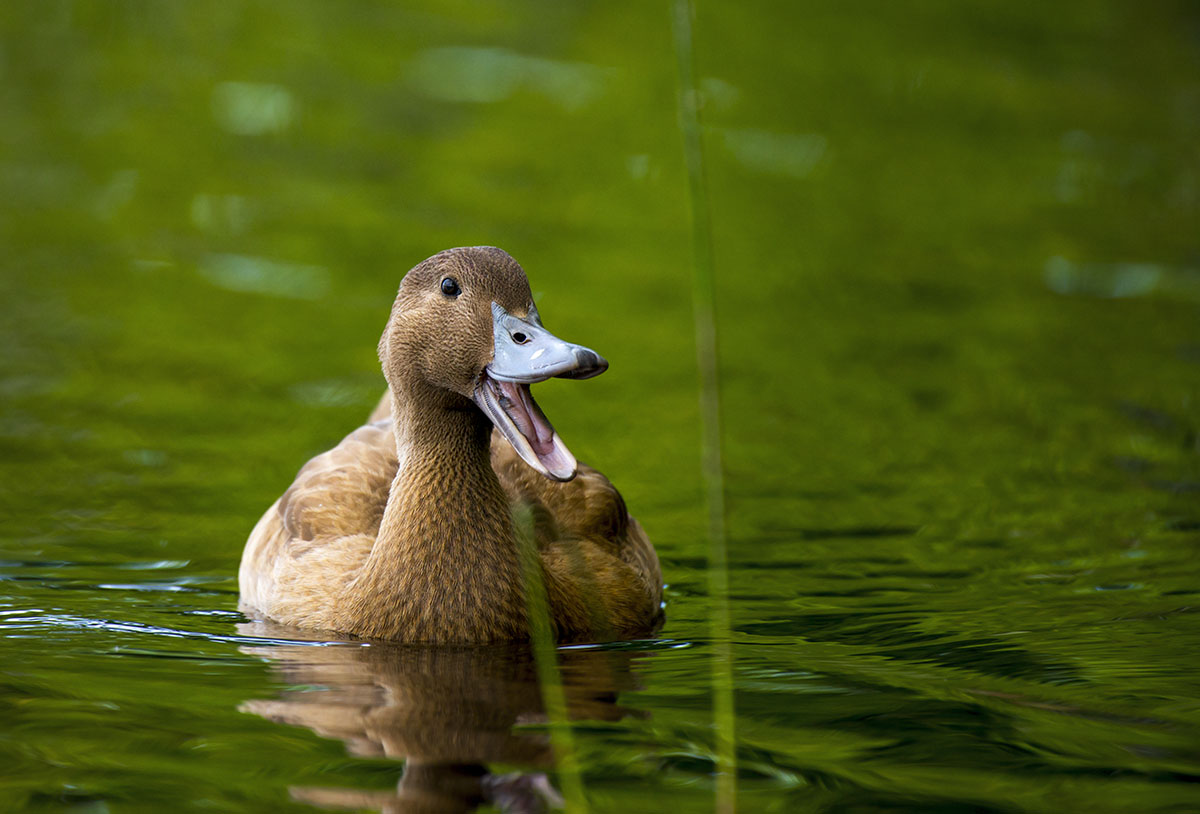
This technique is especially effective with waterfowl, since by getting low you reduce the angle of light that the lake’s reflecting to your lens. This means that instead of getting the reflections of a boring blue or grey sky in the photo, you get the vibrant greens of the tree line, or possibly a striking red and yellow palate in the fall.
However, as you get low you do risk getting some reeds or other foreground distractions in the frame. You can see in the photo of the duck that a couple reeds distract from the subject, despite blending in a little with the reflections on the water. So be extra mindful of clutter when using this composition.
If you can’t get a clear composition, frame the face
Sometimes you just can’t get a clear angle on the bird without foreground clutter getting in the way. While not ideal, this doesn’t mean you can’t still get a good photo. Try to position yourself so that the head of the bird is clear of intruding foliage, and allow the rest of the foreground to act as a frame around the bird as in the photo below.
Even though parts of the bird are blocked by leaves, the photo isn’t ruined. Indeed, framing this way can even enhance the sense of depth and connect the subject to the environment better. So don’t give up if you can’t get a 100% clear shot, you might end up with a better image than you expected.
Use dynamic framing for birds in flight
Let’s face it, the sky is boring. Everyone and their mother has a thousand photos of birds flying in the sky, and they simply aren’t that interesting. Seen one, seen them all. But what if there’s a really cool bird flying around? Even with a boring sky, you can use your photography skills to eke out a good shot.
The trick is to frame the subject in a dynamic way. Strong diagonals are key, even if you have to rotate the camera (or do it in PhotoShop). It also helps to shoot for naturally dynamic poses, ones that aren’t lazy soaring but rather changes in direction or other movements that you don’t see as often. Strong eye contact also makes a big difference, and at the very least you need one or both eyes to be visible.
Conclusion
With these six techniques, you’ll be able to make the most of whatever equipment you have and capture photos of birds that stand out. Bird photography certainly isn’t easy, but it’s not rocket science either. And while the fancy gear helps, it’s by no means necessary to getting awesome images - most important is the patience you show in learning the bird’s behaviour, and then choosing the right composition to showcase the moment.
If you want to take things to the next level, you can also think about colour theory during bird photography and plan for great colour combinations. This is a subject that's a bit beyond this article, but I have a whole other article on colour theory in bird photography here if you're interested.
So with that, get out there and apply these strategies to your own photography!
Lauchlan Toal is the creator of UnlockCreativePhotography.com, and a Halifax based food photographer. Outside of food photography, he enjoys most genres, finding fun in any kind of photography challenge.